| This is a Guide page. This means the page will walk you through a specific task, strategy, or enemy/boss fight. This guide was last updated for version 1.4.5.007. |
| Type | Boss |
|---|---|
| Environment | Astral Infection |
| AI Type | Astrum Aureus AI |
| Damage | Contact: 80 / 176 / 198 / 209 Laser: 74 / 128 / 148 / 160 (pre-Moon Lord) 148 / 256 / 296 / 320 (Godseeker Mode) Crystal: 80 / 140 / 160 / 172 (pre-Moon Lord) 160 / 280 / 320 / 344 (Godseeker Mode) |
| Max Life | 89,200 / 142,720 / 171,200 (pre-Moon Lord) 243,750 / 390,000 / 468,000 (Godseeker Mode) |
| Defense | 40 |
| DR | 50% |
| KB Resist | 100% |
| Inflicts debuff | 100% chance |
| Debuff duration | 1 second (Lasers) 2 seconds (Crystals) 3 seconds (Contact) |
| Debuff tooltip | Your flesh is melting off |
| Immune to | |
| Vulnerable to: | |
| Resistant to: |
| Coins | 15 25 |
|---|
- Item (Quantity)Rate
 Soul of Bright (20-40 / 35-50)100%
- 20%
- Aureus Cell (9-12 / 12-16)100%
- Stardust (20-30 / 30-40)100%
- Fallen Star (18-24 / 20-30)100%
- At least one of the following 5 weapons will always drop:
- 25% / 33.33%
- 25% / 33.33%
- 25% / 33.33%
- 25% / 33.33%
- 25% / 33.33%
- 100%
- Suspicious Looking Jelly Bean(After defeating Moon Lord)100%
- 10%
- Supreme Healing Potion (5-15)100%
- 14.29%
- 10%
- Astrum Aureus (Lore)(Always on first kill)100%
- Treasure Bag(Astrum Aureus)
- • Starlight Fuel Cell(in Revengeance Mode only)
100% - •


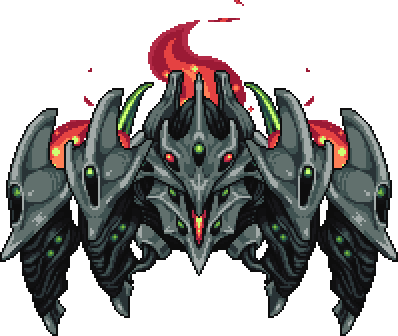
Astrum Aureus is a Hardmode boss that is usually fought after defeating both Calamitas and Plantera. After defeating the Moon Lord, Astrum Aureus begins to drop Lunar Fragments. In Revengeance Mode, Astrum Aureus will also receive a buff to its stats and begin to drop the Suspicious Looking Jelly Bean. Astrum Aureus can be spawned by using an Astral Chunk in the Astral Infection at night.
This guide will mention items exclusive to Expert and Revengeance Mode with no special formatting and will follow the intended progression.
Terrain Preparation[]
Astrum Aureus requires a lot of room to dodge its projectile swarms. A flat surface to summon Astrum Aureus is highly recommended as this can also be used to destroy Aureus Spawns in Revengeance and Death Mode. Two long sets of platforms, spaced out roughly 30 blocks apart, should be utilized to allow for an easier time dodging. One-block thick walls and roof can also help with mobility and with destroying Aureus Spawns.
Strong vertical mobility is a valuable asset for this fight as well as good horizontal mobility. As such, it wouldn't be a bad idea to invest in some Weightless Candles. Additionally, placing Campfires and Heart Lanterns can help with recovery from hits.
You may use the Clentaminator with Astral Solutions on a pre-existing flat arena for other bosses in this fight, as Astrum Aureus does not enrage when taken out of the biome, and it is much more efficient than building a new arena within the Astral Infection biome.
Gearing Up[]
Armor[]
- Reaver armor is a well-rounded armor set for all classes.
- Chlorophyte armor can also be utilized but is generally regarded as weaker than Reaver.
- Spectre armor with the Spectre Mask or Brimflame armor are recommended for Mages due to the immense damage output potential.
- Spooky armor is generally preferred for Summoners due to the high damage bonuses for minions.
- Umbraphile armor is generally preferred for Rogues, as it trades a bit of defense for more overall bonuses.
Accessories[]
- Any pair of Wings should be prioritized for the player.
- The Aureate Booster can also be used to gain additional vertical mobility in exchange for a lack of horizontal speed.
- A Frog Leg or Aero Stone can be utilized with wings to give an extra boost to movement speed.
- The Aureate Booster can also be used to gain additional vertical mobility in exchange for a lack of horizontal speed.
- The MOAB is another alternative set of wings but is generally more difficult to use effectively.
- Angel Treads are a necessity for avoiding Astrum Aureus' projectiles and summons.
- Any accessory that allows the player to dash is extremely helpful as it can be used to make quick dashes to escape deadly situations.
- The Crown Jewel can be used to help reduce the effects of the Astral Infection debuff.
- Alternatively, the Margarita drink halves its duration at the cost of some defense and life regeneration.
- Even better, the Ursa Sergeant provides complete immunity and further defensive bonuses at the cost of some movement speed.
- Melee players should use the Mechanical Glove or the Bloody Worm Scarf for their strong melee boosts as well as the latter's increased damage reduction.
- If the player is utilizing Yoyos, then the Yoyo Bag should be prioritized.
- Ranged players should use the Ranger Emblem or Magic Quiver to help in boosting damage output.
- Magic players should use the Celestial Emblem to both boost magic damage and make picking up stars much easier.
- Summoners can boost their minion damage with the Hallowed Rune and with Statis' Blessing
- Rogue users will find the Vampiric Talisman and the Abyssal Mirror useful in terms of utility and damage.
Weapons[]
Melee[]
- The Terra Blade and Terra Edge are both great all-around weapons that have decent damage and projectiles that allow the player to stay away from Astrum Aureus.
- The Abyss Blade can also be utilized, but requires the player to be much closer to Astrum Aureus in order to use it more effectively.
- The Ark of the Ancients is another strong option for melee users against Astrum Aureus, but is less effective if the player builds a roof as it will block some of this weapon's projectiles.
- The Vampire Knives are an excellent option that deal very high damage to the boss as well as provide healing through lifesteal.
- The healing from this weapon should not be relied on as Astrum Aureus deals very high damage.
Ranged[]
- The Blossom Flux is a powerful option for this fight due to the constant fire of leaves the weapon produces, but be aware that as this is a Legendary weapon, it could be difficult to get.
- The Ballista combined with high-damaging arrows can decimate Astrum Aureus.
- The Megalodon combined with Icy Bullets can also deal massive damage to Astrum Aureus.
- The Sea's Searing also a fantastic choice, due to the large size of the boss. However, as it is a Legendary weapon, it could be very hard to get.
- The Snowman Cannon paired with Rocket IIIs can deal very high damage to Astrum Aureus.
Mage[]
- The Blizzard Staff can deal immense damage to Astrum Aureus if all of its icicles land hits.
- The Razorpine can deal high damage, at the cost of a low usable range.
- The Lashes of Chaos's large explosive radius gives it a great use from longer distances.
- The Everglade Spray is an excellent support option that inflicts both the Ichor and Cursed Inferno debuffs.
Summoner[]
- Dormant Brimseekers can deal good damage to Astrum Aureus.
- The Dreadmine Staff summons a powerful sentry that provides important aid.
- The Ballista Cane is an alternative that can be spammed through constant recasting.
Rogue[]
- The Brackish Flask is extremely effective against Astrum Aureus.
- The Duststorm in a Bottle is a good alternative that deals similar damage.
- Fantasy Talismans with the Vampiric Talisman can be used to heal, even when far away from the boss.
- If stealth is prioritized, the Frostcrush Valari can easily tear through Aureus, at the cost of low range.
Classless[]
- A Lunic Eye and a Golden Gun can make the fight easier to bear due to their powerful debuffs.
Miscellaneous[]
- The Well Fed buff provides a useful all around stat boost.
Gearing Up Post-Moon Lord[]
Armor[]
Lunar armors are generally recommended for each class:
- Solar Flare armor for Melee
- Vortex armor for Ranged
- Nebula armor for Mage
- Stardust armor for Summoner
- Empyrean armor for Rogue
Accessories[]
- Lunar Wings (with Angel Treads) or Seraph Tracers are the preferred wings.
- Asgard's Valor or Statis' Ninja Belt allow the player to make sharp turns and are very useful.
- Asgard's Valor additionally gives knockback immunity and many defensive boosts.
- Statis' Ninja Belt additionally provides the chance of a ninja dodge, increased jump acceleration.
- The Absorber is important for survivability by increasing damage reduction as well as giving increased jump acceleration.
- The Community is a great all-around accessory that boosts offensive and defensive stats as well as flight time.
- The Heart of the Elements provides many all-around boosts including damage, damage reduction, life regen, and jump acceleration.
- The Deific Amulet is an excellent option, providing additional immunity frames.
- Melee players should use the Fire Gauntlet and Celestial Shell for the wide range of boosts both provide.
- Ranged players should use the Sniper Scope or Artemis Emblem, which both help in boosting damage output.
- The Artemis Emblem additionally gives some life regen and ammo conservation.
- Magic players should use the Sigil of Calamitas for its strong magic boosts.
- Summoners can boost their minion count and damage with Statis' Blessing, Star-Tainted Generator and Statis' Curse.
- Rogue users will find Dark God's Sheath and Moonstone Crown useful to boost their damage output.
Weapons[]
Weapons made from Luminite Bars are typically the best options for the fight.
Melee[]
- The True Biome Blade is an excellent option with homing and high single target damage.
- The Plague Keeper is a great option that spawns swarms of bees to attack Astrum Aureus.
- The Elemental Shiv has homing and summons many other blades to damage Astrum Aureus.
Ranged[]
- The Onyx Chain Blaster is an excellent option that deals high damage when landing the onyx blasts.
- The Disseminator is a great weapon that rewards good aim and is not punished by Astrum Aureus' high defense as much as the Shredder.
- Holy Fire Bullets are the preferred ammunition for guns.
- The Clockwork Bow is an excellent option that takes advantage of Astrum Aureus' large hitbox and is best paired with Luminite or Terra Arrows.
Mage[]
- Although DPS is lower, Nuclear Fury is a low damage option allowing the player to focus on dodging.
- Genisis is a powerful option that requires the player to remain close but deals immense damage.
- Apoctosis Array has high single-target damage, but it requires effective maintenance of mana.
- The Ultra Liquidator is an excellent weapon for dealing damage and applying Ichor for long periods of time.
Summoner[]
- Elemental Axes are an excellent option, being able to easily target Astrum Aureus at all times.
- Tactical Plague Engines are also good, but they require a lot of ammo due to their high fire rate.
- The Energy Staff provides additional DPS to aid your minions.
Rogue[]
- The Elemental Disk can provide good DPS at the cost of range.
- Another great choice is the Celestial Reaper for its range and homing, plus its high base DPS.
- Despite low base DPS, the Utensil Poker is an excellent backup weapon for its life stealing.
Classless[]
- A Lunic Eye and a Golden Gun can make the fight easier to bear due to their powerful debuffs.
Miscellaneous[]
- Farm Blood Orbs to easily craft many helpful potions that will increase your survivability.
- If in multiplayer, Wormhole Potions are a cheap and effective tool to escape death.
The Fight[]
Astrum Aureus' fight vastly differs based on the players game mode. Due to this, Revengeance and Death Mode fight breakdowns will be separate from the main breakdown. Also, this fight tends to take a while due to the bulky nature of Astrum Aureus, and the heavy focus on dodging over damage dealt. Keep this in mind while fighting it, and don't expect the fight to end quickly.
Normal and Expert Mode[]
Astrum Aureus will spawn just above the player and fall to the ground. Afterwards, Astrum Aureus will begin its cycle of attacks. It first stops all of its movements and goes idle for three seconds; during this "recharge" phase, Astrum Aureus loses all defense and contact damage. Once this phase ends, Astrum Aureus will chase the player and fire a barrage of five lasers eight times, while continuously chasing the player on the ground. The best way to avoid these barrages is to make a horseshoe shape around Astrum Aureus, dashing at every opportunity you have to maximize the effect of the shape. After the eight barrages, Astrum Aureus will jump twice, shattering the ground around it and it will fire an additional barrage each time a jump is performed. Distance is key for these two jumps as the area of effect of the jumps is quite large and will deal massive damage. This can also easily be avoided by staying in the air during these jumps. After these jumps are completed, Astrum Aureus will enter its "recharge" phase, and begin to cycle though its attacks again.
Upon reaching 50% health, Astrum Aureus will no longer jump twice. Instead, after the eight barrages are finished, Astrum Aureus will jump once normally, then release three waves of eight Astral Flame Crystals. These crystals will gain increased speed and homing capabilities as they get closer to the player and can quickly overwhelm the player. After 10 seconds of chasing the player, they will lose all homing capabilities and continuously fly in one direction until they despawn. Avoiding the crystals can be tricky, but having distance is key since they are less of a threat when further away. Running to either the left or right on a flat surface may prove useful in avoiding the crystals, but keep in mind that Astrum Aureus will continue to attack the player with its cycle of attacks while the crystals persist. Moving too far left or right may cause Astrum Aureus to despawn, so it's important to stop running after a maximum of three seconds to avoid this. Also note that Astrum Aureus can be passed through without harm during its "recharge" phase, which can be used to help avoid the crystals. After Astrum Aureus launches all three waves of crystals, it will teleport near the player and "recharge". Then the cycle will repeat itself.
Astrum Aureus has no other attack changes, nor does Astrum Aureus' fire rate of its projectiles increase with health lost.
Revengeance and Death Mode[]
Astrum Aureus will spawn above the player, fall to the ground, "recharge", then cycle through its attacks as normal. It will fire eight barrages of five lasers while chasing the player on the ground. The best way to avoid these barrages is to make a horseshoe shape around Astrum Aureus, dashing at every opportunity you have to maximize the effect of the shape. After the eight barrages, Astrum Aureus will jump thrice, shattering the ground around it and it will fire an additional barrage each time a jump is performed. Distance is key for these three jumps as the area of effect of the jumps is quite large and will deal massive damage. Following both jumps, Astrum Aureus will launch a wave/waves of eight Astral Flame Crystals, as well as two Aureus Spawns.
Aureus Spawns are initially harmless and they have 3000 health, but once their health reaches 1000, they become invincible and begin to rapidly accelerate towards the player. Once in this state, they will explode upon contact with tiles or the player, killing themselves and potentially dealing damage in the process. Leading the Aureus Spawns into the walls or roof will cause them to explode. Keep in mind that only two Aureus Spawns can be alive at a time, and are only summoned while Astrum Aureus is launching waves of Astral Flame Crystals.
The number of waves of Astral Flame Crystals increases with how much Astrum Aureus' health depletes. One wave of crystals will launch if Astrum Aureus is above 75% health, two waves of crystals will launch if Astrum Aureus is in between 75% and 50% health, and three waves of crystals will launch when Astrum Aureus is below 50% health. These crystals will gain increased speed and homing capabilities as they get closer to the player and can quickly overwhelm the player. After 10 seconds of chasing the player, they will lose all homing capabilities and continuously fly in one direction until they despawn. Avoiding the crystals can be tricky, but having distance is key since the crystals are less of a threat when further away. Running to either the left or right on a flat surface may prove useful in avoiding them, but keep in mind that Astrum Aureus will continue to attack the player with its cycle of attacks while the crystals persist. After Astrum Aureus launches the Astral Flame Crystals and the Aureus Spawns, it will teleport near the player and enter its "recharge" phase. Then the cycle of attacks will repeat itself.
General Tips[]
- The Rod of Discord and the Normality Relocator are very useful tools as they allow instantaneous teleporting.